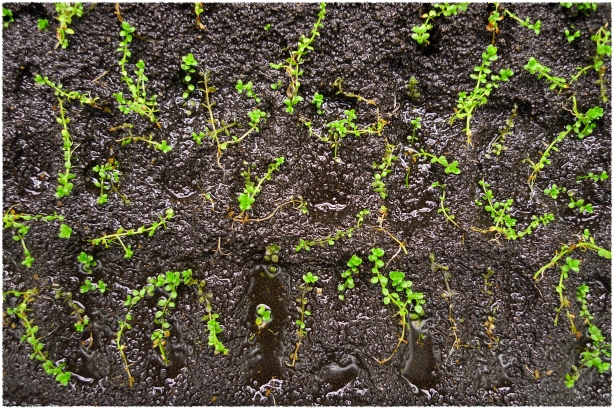
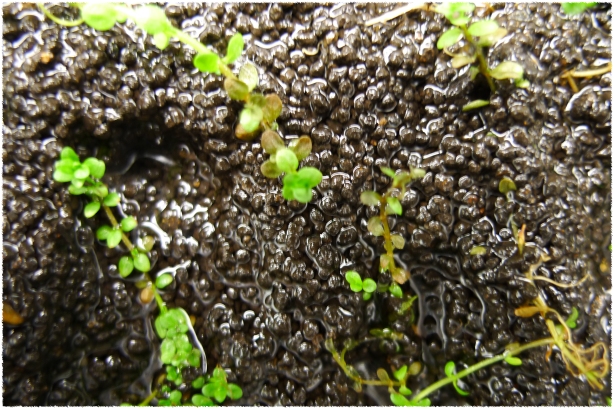
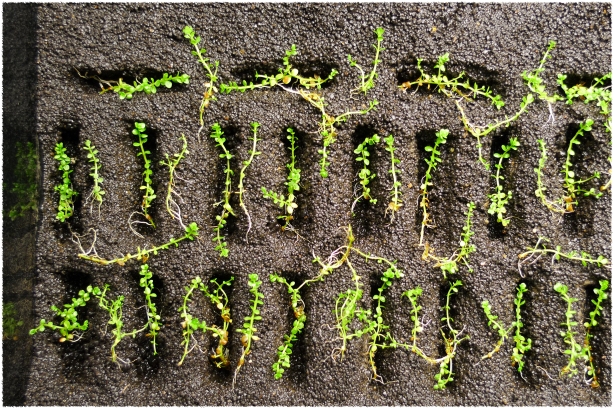
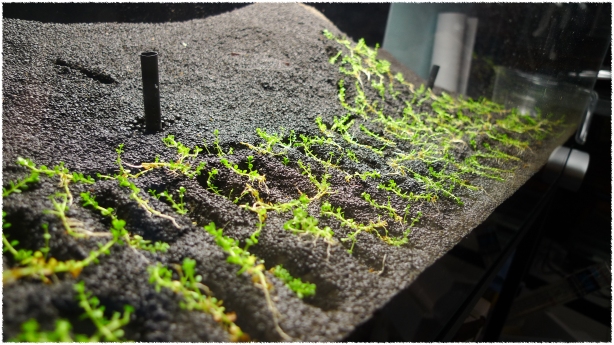
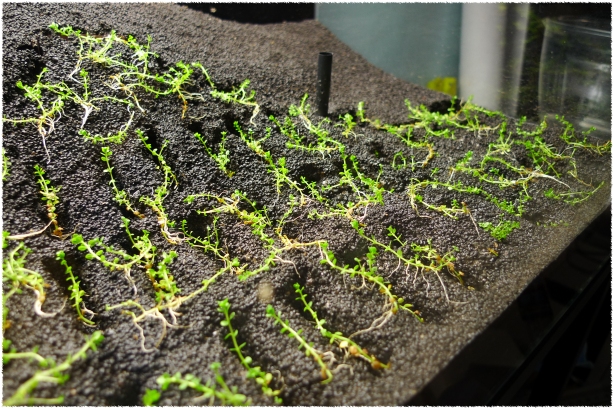
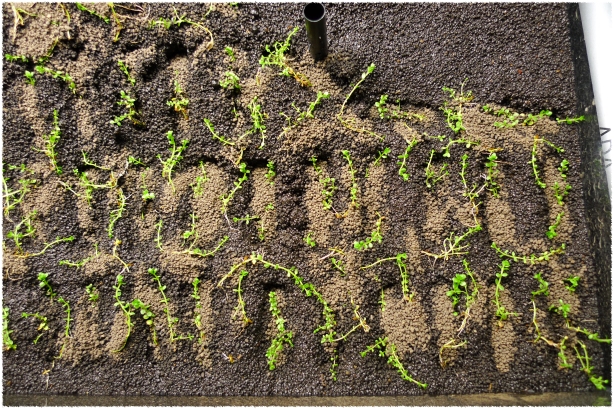
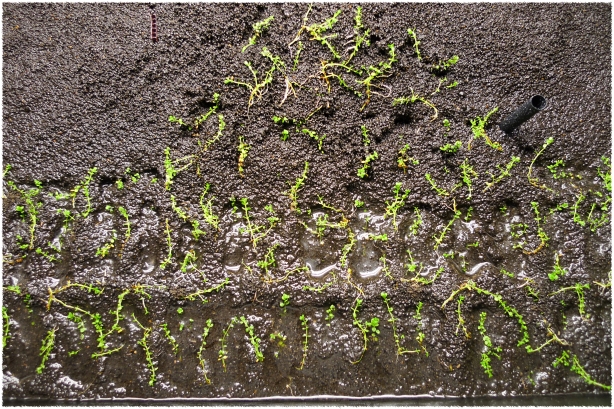
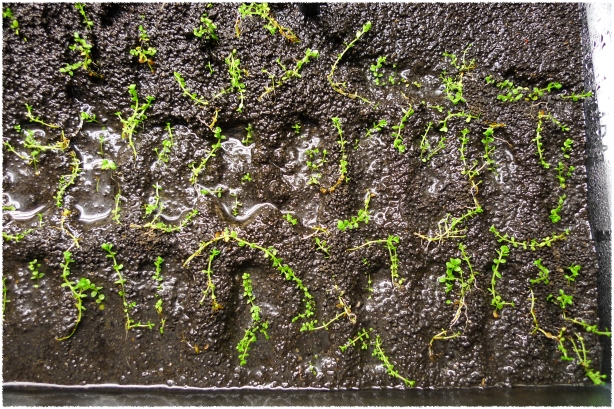
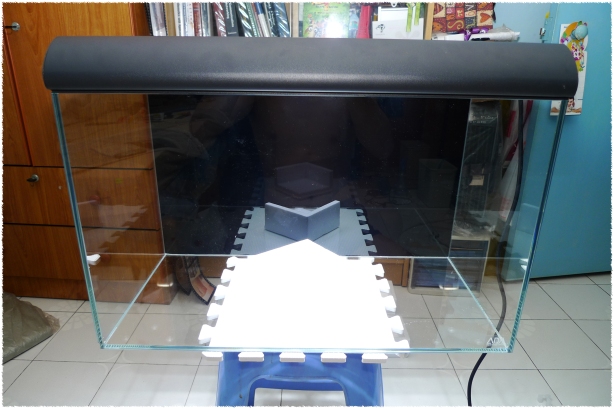
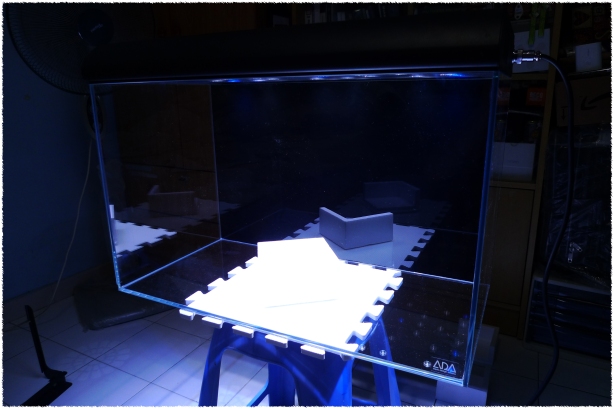
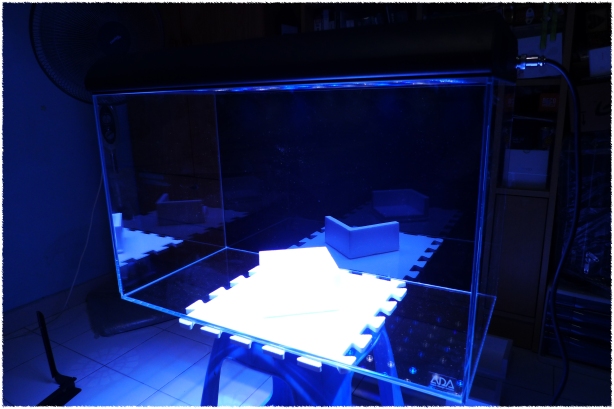
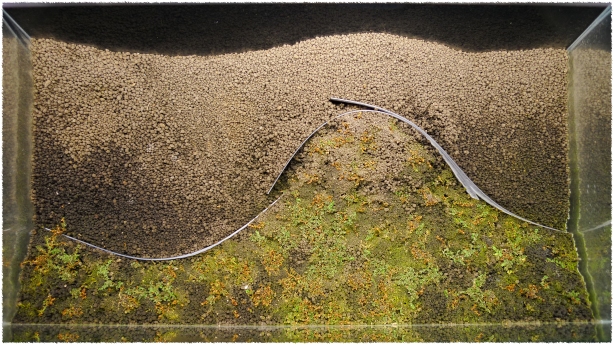
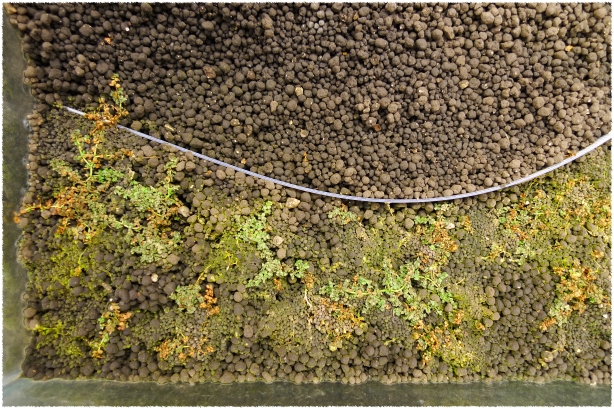
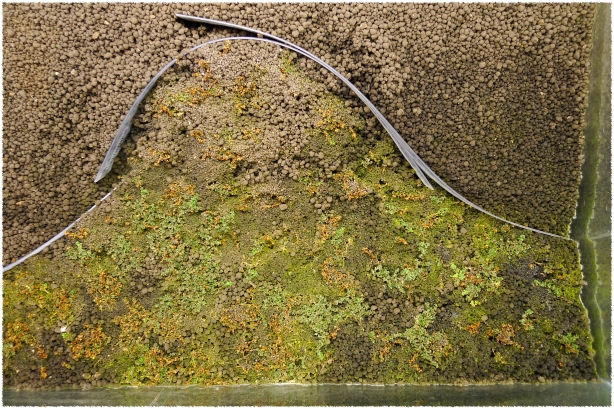
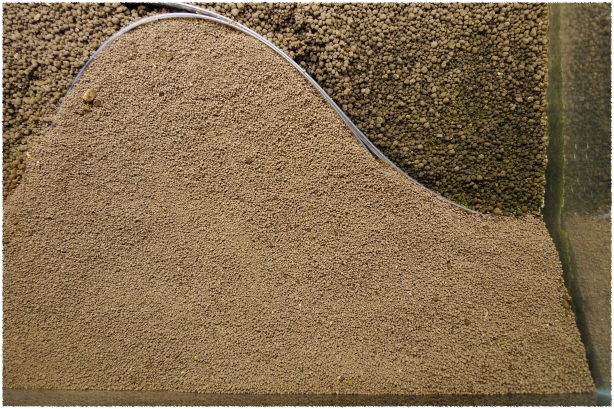
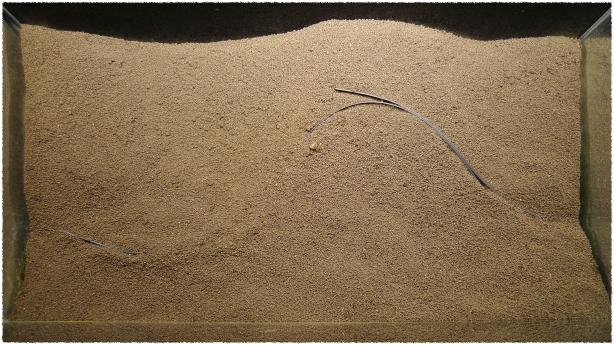
Well, today I launched my second attempt. Only this time round, I am going to do what few others will bother. I am going to plant strand-by-strand. Other than this approach (to planting), most of the delta in Attempt #2 of  my Dry-start Method implementation is executed during the pre-deployment<insert link>. The only other significant difference, is the usage of a glass top to completely seal the moisture in when illumination is engaged. I’ll let the photos narrate the process.


I know exactly what you are. I see exactly what you want. If you are looking for latitude, I can tell you I don’t have any. But what I do have are a very generous serving of fortitude; tenacity I have acquired over some very arduous life experiences. A resilience that make me a nightmare for green scum like you. If you let my plants go now, that’ll be the end of it. I will not look for you, I will not pursue you. But if you don’t, I will look for you, I will find you, and I will eradicate you.

Well, that’s a full two-&-a-half months of solid effort gone down the gutter; but life’s short & there ain’t much time to take things lying down. So I have to proceed with implementation #2 of my Dry-Start Method learning experience. This time round, I am prepared to go the extra mile in all aspects of the deployment environment.

Precautions in execution include:

  1. I believe flooding is a major destroyer of yield. This time round, I will implement measures to prevent & eliminate any flooded regions.
  2. I believe inconsistency in humidity, temperature & moisture content invites risks of yield failure. I have to devise some mechanism to maintain most, if not all, of these attributes.
  3. I believe excessive lighting & lighting in the wrong places will be a potential source of ingress for algae.
  4. On a less critical note, I believe there are more effective & precise methods to tweak the topography of the substrate.
  5. Likewise, I believe extra procedures have to be in place to maintain that topography over time.

So with these new guidelines in mind, I set off to prepare the deployment ground for batch #2 of my foreground carpeting plant, the hemianthus callitrichoides.

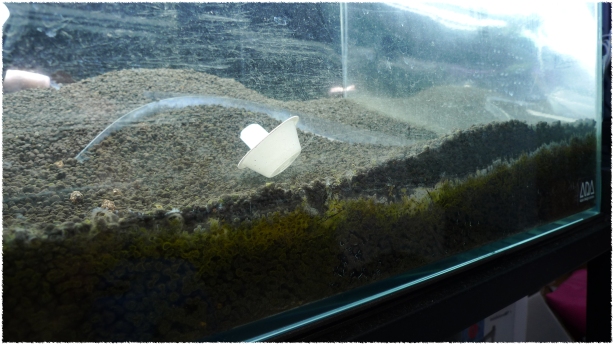
Step 1: secure a pair of broad-diameter straws, pierce holes (using a hot paper-clip) along their length in all axis.The holes should be smaller than the size of each granule of your substrate. The straws should preferably be opaque in colour, so that at their area of insertion no light is transmitted into the substrate, i.e. concept of optic-fibre. This may sound a bit ludicrous, but note that when the lights are powered on, imagine the clear walls of transparent straws are transmitting some light constantly all the way into the substrate. In the event of extreme flooding, these straws will act as outlets where excess water is drawn out. That's is why their diameter must be able to accommodate an air tube's girth.

Step 1: secure a pair of broad-diameter straws, pierce holes (using a hot paper-clip) along their length in all axis.The holes should be smaller than the size of each granule of your substrate. The straws should preferably be opaque in colour, so that at their area of insertion no light is transmitted into the substrate, i.e. concept of optic-fibre. This may sound a bit ludicrous, but note that when the lights are powered on, imagine the clear walls of transparent straws are transmitting some light constantly all the way into the substrate. In the event of extreme flooding, these straws will act as outlets where excess water is drawn out. That's is why their diameter must be able to accommodate an air tube's girth.

Step 2: Grab a bunch of Post-it notes, & list down each significant numerical aspect of the substrate, e.g. height of front edge, height of rear apex, etc. After which, stick these "labels" at their actual positions, preferably on the outer side of the tank wherever possible.

Step 2: Grab a bunch of Post-it notes, & list down each significant numerical aspect of the substrate, e.g. height of front edge, height of rear apex, etc. After which, stick these "labels" at their actual positions, preferably on the outer side of the tank wherever possible.

Step 3: Lay the base additive system as per the first deployment.

Step 4: Position straws vertically & slowly fill the tank with substrate. It is important to note that the lazy method of inserting the straw into the substrate after the substrate has been laid in the tank, is ill-advised as the straws will be choked & their primary purpose will be ineffective: drawing excess water from a flooded substrate.

Step 4: Position straws vertically & slowly fill the tank with substrate. It is important to note that the lazy method of inserting the straw into the substrate after the substrate has been laid in the tank, is ill-advised as the straws will be choked & their primary purpose will be ineffective: drawing excess water from a flooded substrate.

Step 5: Scape the substrate so that its topography aligns with the various Post-it notes that are distributed around the tank.

Step 6: Completely devoid the tank of light by sticking pieces of black paper on all clear sides entirely.

Step 7: Mist the surface of the substrate to make it “clumpy” to facilitate further modifications to its surface.

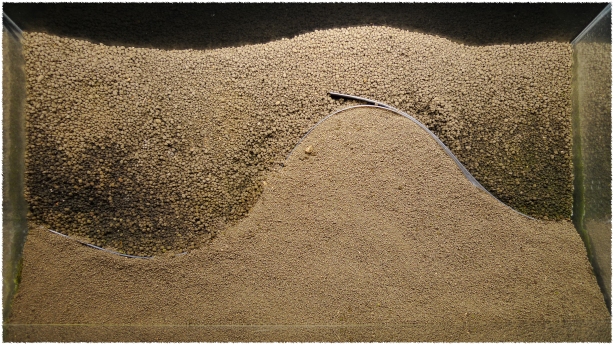
Step 8: Drive a few pieces of bent corrugated foam boards into the higher regions of the substrate to maintain the steep slope over time. Their apexes must be facing the slope's angle of repose.

Step 8: Drive a few pieces of bent corrugated foam boards into the higher regions of the substrate to maintain the steep slope over time. Their apexes must be facing the slope's angle of repose.

This is how the corrugated plastic board look like

This is how the corrugated plastic board look like

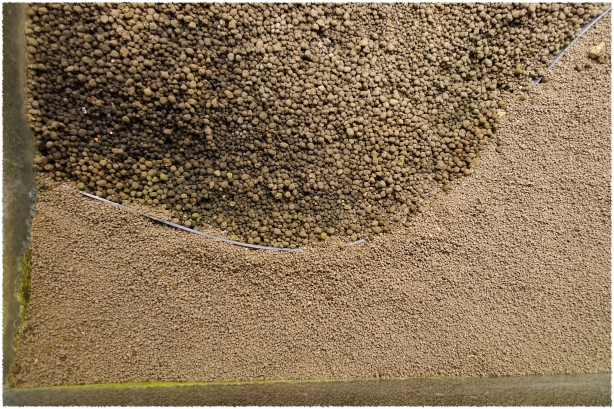
Step 9: Use a tool to create organized, regular depressions into the substrate where the plant nodes are supposed to be planted.

Step 9: Use a tool to create organized, regular depressions into the substrate where the plant nodes are supposed to be planted.

A closer look at the depressions from the left.

A closer look at the depressions from the left.

A closer look at the depressions from the right.

A closer look at the depressions from the right.

Step 10: Use a vessel with a pouring tip, e.g. one of those small jugs use for cooking, to pour dechlorinated (but again, not de-ammonium-ized) water into the straws gently & steadily. The effect is quite awesome when I execute Step 7. I saw water saturating the substrate from beneath it, all the way until some water peeks above the topsoil (at which point I stop pouring).

Step 10: Use a vessel with a pouring tip, e.g. one of those small jugs use for cooking, to pour dechlorinated (but again, not de-ammonium-ized) water into the straws gently & steadily. The effect is quite awesome when I execute Step 7. I saw water saturating the substrate from beneath it, all the way until some water peeks above the topsoil (at which point I stop pouring).

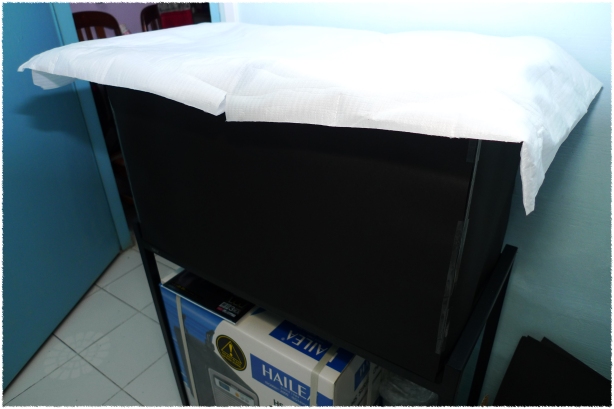
Step 11A: Cover the top of the tank with an opaque material when there is any form of visible light around. I will not allow any form of algae to have a head-start in this tank.

Step 11A: Cover the top of the tank with an opaque material when there is any form of visible light around. I will not allow any form of algae to have a head-start in this tank.

Step 11B: Cover the top of the tank with some mesh at night, only when there is no light in the room. This is to air the substrate to dry out excess surface water before planting. Preferably the mesh should have very fine holes so that dust in the room will not enter the tank.

Step 11B: Cover the top of the tank with some mesh at night, only when there is no light in the room. This is to air the substrate to dry out excess surface water before planting. Preferably the mesh should have very fine holes so that dust in the room will not enter the tank.

And then we lie in wait…for a week or so until

Posted: February 25, 2012 by ralliart12 in Roadblocks, ~ § Aquascape § ~
Tags: , , , , , , , , , , , , , , , , , , , , , , , , , , , , , , , , , , , ,


Light Emitting Diodes (LED) has steadily became the lighting of choice for reef system owners to replace their hot & inefficient Metal Halide lamps. As I have plans to migrate to reef systems in the future, I decide to try my hand on DIY-ing a LED light set, i.e. doing-it-yourself. Upon further research, I can say the learning curve is moderately-steep, but not impossible to climb. The most tricky portions involves matching the right type & quantity of drivers with the type and quantity of LEDs one is trying to “drive”, i.e. power. Due to the varied wattage & voltage requirement & tolerance of each type of LED, i.e. maximum of 3A current tolerance of an XM-L class “bulb” versus the 1A current tolerance of an XP-E class bulb, coupled with their different (forward) voltage consumption when being driven at different current ratings, i.e. an XM-L class bulbs consumes 2.9V when driven at 350mA, 3.1V when driven at 1500mA, 3.35V when driven at 3000mA, you can see how the permutations increases rapidly. But still, it was quite a solid learning experience, which I have to thank the company, RapidLED, for. They responded professionally & rapidly to all my technical queries in a manner that seems sincere in ensuring I do not make any errant purchase.

There’s also the difficulty of procuring some of the components involved in making the light set. The most troublesome item is the heatsink. Of which I am unable to find a single (heat dissipation will work better with multiple fans cooling a single piece than the same number of fans cooling separate pieces of heatsinks) 24″ long aluminium heatsink in Singapore & to import it from overseas (from HeatsinkUSA) will add significantly to the DIY cost. But despite all these (costs & technical challenges), I still strive on. I discovered there were tons more information to be found in the reef forums than freshwater counterparts, e.g. proper utilization of dimmable drivers, DIY journal such as this, this, this, this, this, this, this, this, this, & this, etc.

Just when I was about to order the materials to make a LED light set of my own, I change upon a ready-made model that is competitively-priced. Mind you, previously I was looking at the Maxspect Mazarra LED light set which would have bitten SGD$1580 (for a 2-foot tank-appropriate model) out of my wallet. The model that I end up purchasing is the OCReef X Series 120w CREE™ LED Aquarium Light, which costs USD$599.99 (which costs me around SGD$767.41, sans shipping), around half the price of the Mazarra. While the X-series I purchased loses out to the Mazarra in terms of programmability, beauty of the supporting infrastructure (the light stand, the remote control user interface, etc), functionally I will say that the X-series by OC Reef is able to go almost head-to-head with the Mazarra. In addition, OC Reef’s response to my queries before & after the purchase is quite decent as well. But most importantly, the X-series uses Cree bulbs for all its 40 LEDs whereas the Mazarra has 38% of its bulbs from Cree, 50% of its blubs from Philips Luxeon Rebel, & 13% of its bulbs from SiBDI. I would say the Luxeon Rebel (& most probably the SiBDI) bulbs are quality 3W-LEDs in their own rights, but having a full Cree-based LED light set, with 8 more bulbs (the Mazarra model meant for a 2-foot tank has 2 modules with 16 bulbs per module) at half the price? I have only this to say:

Which brings me to my next pet peeve: quality of a LED. Many of you may have came across LED applications in your daily life, be it a simple torchlight, or even as lights for your fish tank (as a matter of fact, my area of residence is using LED lamps from Aztech to illuminate the stairway), but you may be alarmed by the price of my LED light set. I wish to point out that the LEDs I (as well as many reefers) am using, are not in the same league of LEDs as those more economically-priced counterparts. For example, the Aquazonic Sirius LED light set (the model meant for 2-foot tanks). It has 60 bulbs in total & only consumes 12.5watts overall. This means each bulb can only give up a maximum of 0.21watts of light energy (assuming 100% efficiency). Each of the Cree diode in my X-series, & the Mazarra, can deal out 3 solid watts of power (when cranked up to the maximum). The X-series can provide 120watts of lighting energy when it is running at maximum capacity. On a related note, that is why my Olight I1 EOS, with a single XM-L bulb, is able to (literally) outshine similarly-sized torches with more than 10 LED bulbs; it simply is using a different class of LED.

Olight i1 EOS

The Olight i1 EOS, which is my current EDC.

At this juncture, many will ponder how much extra I have to pay for a ready-made aquarium LED light set compared to making one by myself. Most may assume DIY is always the cheaper route, but this time round, even I was proven wrong, as the following spreadsheet demonstrates (this is as much as I can match to the unit OC Reef is offering; but of course it isn’t a 100%-match):

Component Quantity Price in USD (Unit) Price in USD (Sub-total)
CREE XM-L Cool White T6 LED on star 20 $9 $180.00
CREE XP-E Royal Blue 3W LED on star 3 $3.40 $10.20
CREE XP-E Blue 3W LED on star 17 $3.60 $61.20
CREE XM-L Lens/Optics 20 $1.50 $30.00
CREE XP-E Lens/Optics (>40-deg) 20 $1.25 $25.00
10.000″ Wide x 24″ Long Heatsink (excluding separate shipping) 1 $73.57 $73.57
120mm Vantec Stealth Fan Kit 1 $49 $49.00
Y-shaped Hanging Kit 1 $10 $10.00
Bulk Wire (Black; 1-foot) 3 $0.25 $0.75
Mean Well LPC-35-700 constant current driver 2 $16 $32.00
Mean Well LPC-60-1750 constant current driver 2 $16 $32.00
3-Prong Power Cord 2 $3 $6.00
10V AC Adapter 1 $10 $10.00
TOTAL $519.72

Of course, there are some differences in the final product, i.e.:

  • technically-speaking, the X-series does not come with a heatsink, but is only mounted on a fin-less metal board, which is a pathetic excuse for a heatsink. The only consolation is that the final product is housed in an anodized aluminium body that is definitely more “polished” than my initial heatsink frame-design;
  • the X-series is driven via a proper power supply box with dimming controls, as compared to the non-dimmable drivers that was in my DIY version. Furthermore, my DIY design requires 4 physical drivers, & no matter how neat I get them into a “project box”, the end-result will still be very bulky;
  • the X-series come with a splash-guard, serviceable metal light stands & a remote-control. None of which were in my original DIY design.

& in the end, it still costs me “only” $599. Although I am grateful of the knowledge which I have already cumulated as part of the DIY process, but I’m sure you can see why it makes no sense for me to stick to the DIY route. In fact, the knowledge I gained enables me to be very discernible about the various attributes while shopping for a ready-made version.

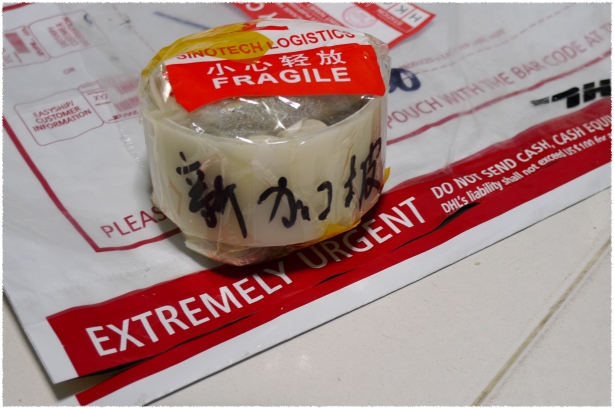
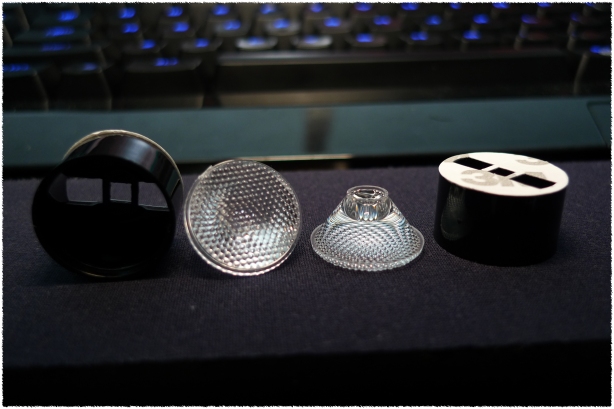
Now then, I must say the purchase, or rather, the actual unit of OC Reef’s X-series which I received, isn’t without hiccups. The unit came with a missing piece of optics (the lens used to focus the spread of an LED’s beam), & more severely, a broken fan. I was already concerned to hear what sounded like a “loose screw” upon flipping the unit around to take photos, only to realize the struts holding one of the fans in place, has been snapped. The metal “legs” that slides along the light housing for propping it up on a tank, can be much better designed. But still, all the LEDs were functional & that’s my biggest worry alleviated & only a couple of quick fixes were required to bring the product back to 100%. My after-sales inquiry regarding these defects were met with sincerity & responsiveness. & they sent me a replacement fan as well as 2 spare optics. Overall, I pretty much have nothing further to ask for.

Now I’m just waiting for an on-track tank to deploy it on…in the mean time, photos!!!
The missing optic

The missing optic

This is how one of the fans arrived in. On unpacking, one of the screws was also loose, i.e. I hear a "rustling" sound as I orientate the fixture.
This is how one of the fans arrived in. On unpacking, one of the screws was also loose, i.e. I hear a "rustling" sound as I orientate the fixture.

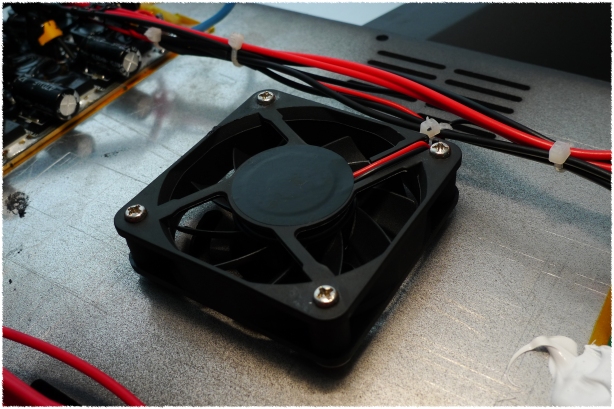
Close-up of a perfectly al right fan

Close-up of a perfectly al right fan

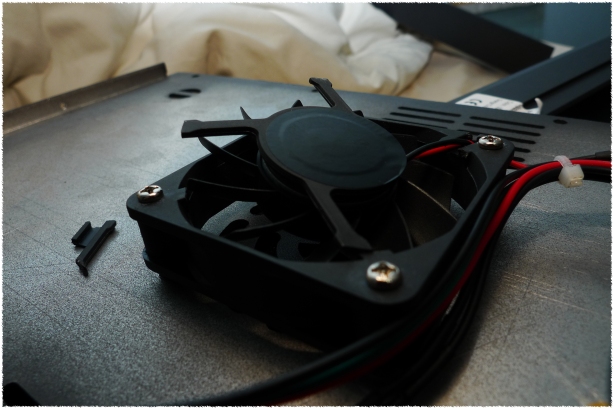
Close-up of the damaged fan

Close-up of the damaged fan

The replacement fan & optics (not shown) arrived speedily

The replacement fan & optics (not shown) arrived speedily

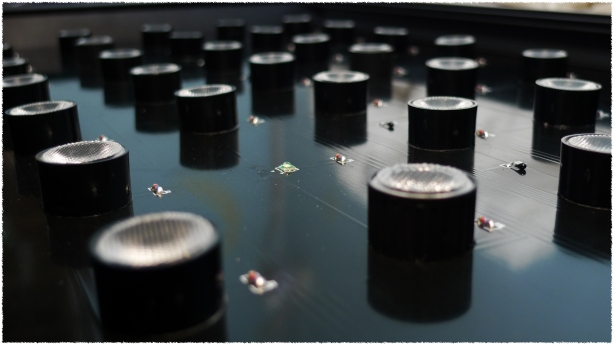
The (replacement) optics

The (replacement) optics

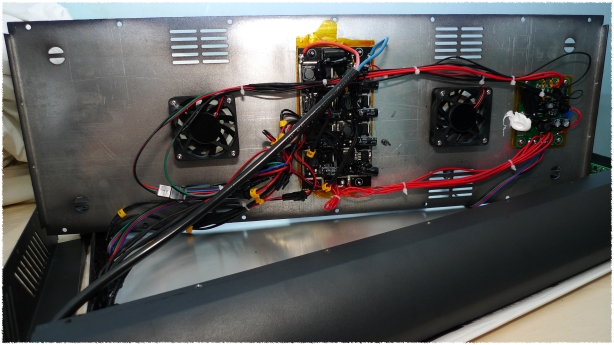
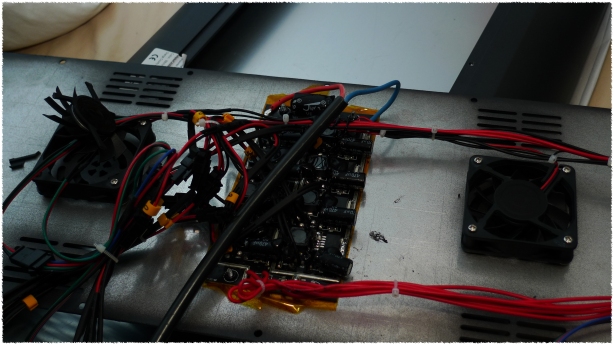
The innards, showing the twin fans, circuit board & not so tidy soldering & cable-bundling

The innards, showing the twin fans, circuit board & not so tidy soldering & cable-bundling

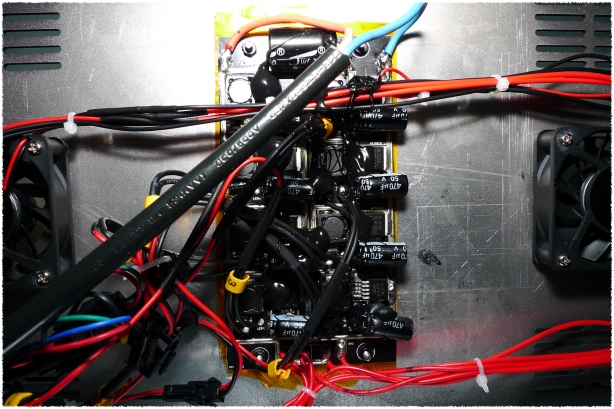
Close-up of the circuit board

Close-up of the circuit board

Due to the massive size of the housing, the light set can technically be used without its metal legs...
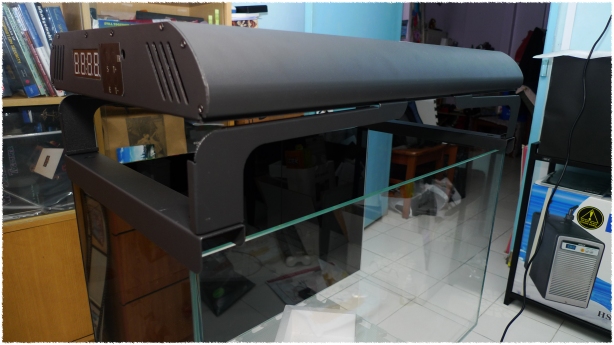
Due to the massive size of the housing, the light set can technically be used without its metal legs...

...but the airflow beneath, will probably be compromised

...but the airflow beneath, will probably be compromised

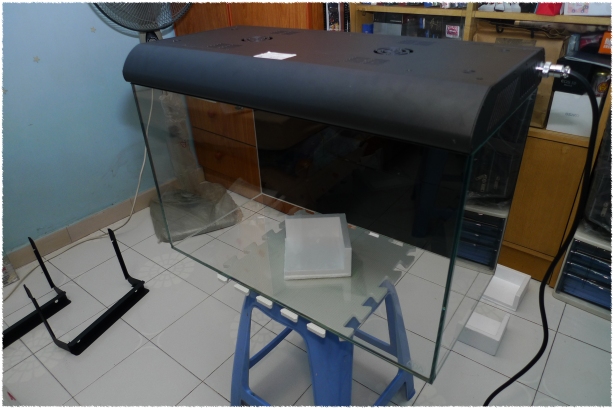
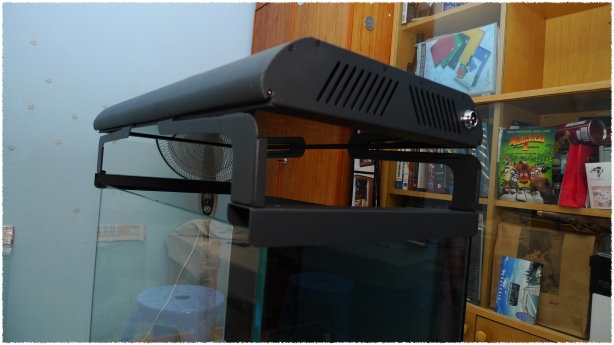
Using the fixture with its "legs" attached, showing the height clearance. The on-board mode display panel can just be seen on the left, in between 2 sets of ventilation vents.
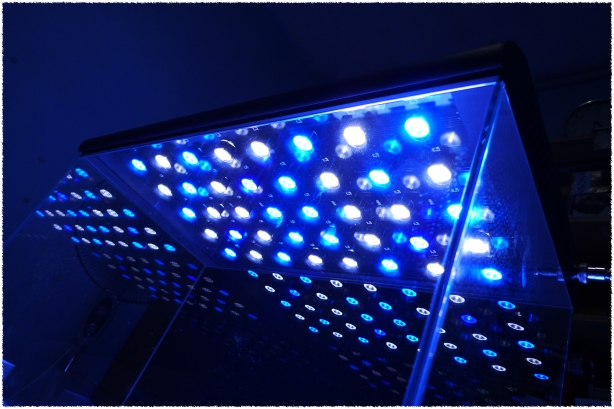
Using the fixture with its "legs" attached, showing the height clearance. The on-board mode display panel can just be seen on the left, in between 2 sets of ventilation vents.

More ventilation vents

More ventilation vents

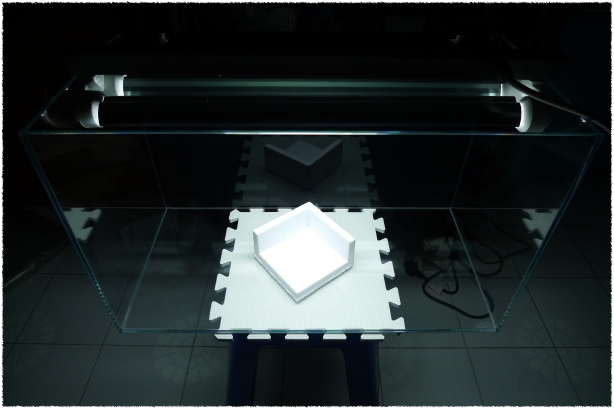
The brightness of 2 tubes of T5HO FL

The brightness of 2 tubes of T5HO FL

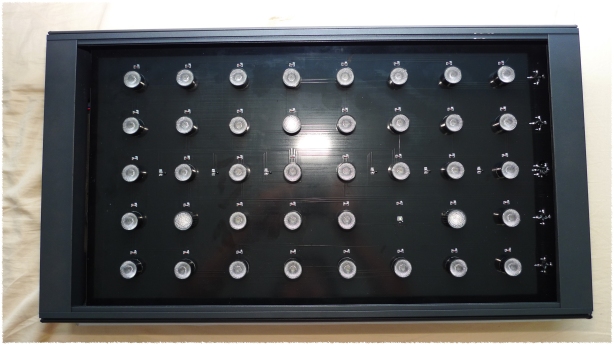
All 40 bulbs of 3-watt goodness

All 40 bulbs of 3-watt goodness

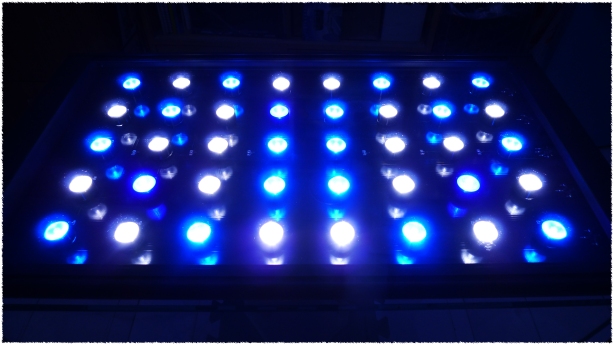
The 40 diodes in action

The 40 diodes in action

Angled view of the optics when all the diodes are activated. Notice that there are 2 sets of blue shades & 1 set of white shade.
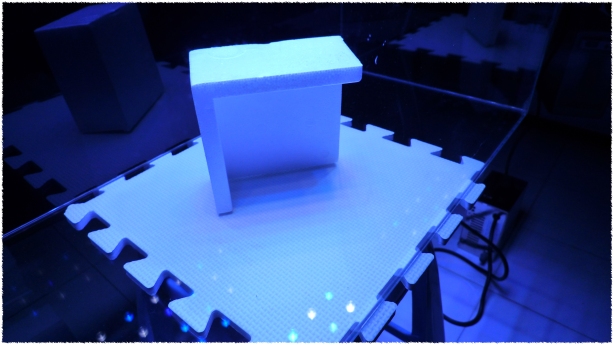
Angled view of the optics when all the diodes are activated. Notice that there are 2 sets of blue shades & 1 set of white shade.

White mixed with some blue

White mixed with some blue

White mixed with all the blues

White mixed with all the blues

Dummy object placed in tank to demonstrate the penumbra & antumbra caused by the use of these optics. Btw, this photo is colour-corrected; it really is that blue when both shades of blue are activated.
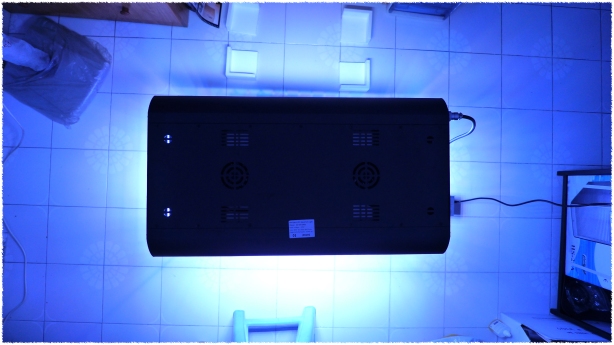
Dummy object placed in tank to demonstrate the penumbra & antumbra caused by the use of these optics. Btw, this photo is colour-corrected; it really is that blue when both shades of blue are activated.

Shot of the fixture from above, showing the amount of light spilling out of the tank's cross-section.

Shot of the fixture from above, showing the amount of light spilling out of the tank's cross-section.

& lastly, a video demonstration of the various illumination modes this unit can support:


On the 14th of February 2012, a colony of highly-assorted algae infiltrated & successfully overwhelmed a field of Hemianthus callitrichoides in a 2-feet village. The massacre was over within a matter of hours. There were no survivors. Looks like no Valentine’s Day for the occupants of this village.

– An external witness

It's a lot worse than it seems

It's a lot worse than it seems

So here’s 10 weeks of consistent daily effort gone down the gutter. An algae attack reduce my progress to zilch. As a matter of fact, my progress has been reset to below zero, i.e. “negative”:

  1. The algae assault team has gone underground, literally. & since I have no water in the tank, using an algae scrapper on a dry & soiled (again, literally) surface runs into the danger of scratching the tank’s glass.
  2. Since at this moment in time, I do intend to re-use the substrate system, it means I can not use harsh chemical solvents (Hydrogen Peroxide, anyone?) to treat the algae; for fear of persistent negative effects harboured in the substrate long into the future.
I'm not even entirely positive as to the species of this algae.

I'm not even entirely positive as to the species of this algae.

So, I did what I can, at least, what measly efforts my broken spirit allows me to pursue today:
  1. I removed all traces of the HC, i.e. algae-fied, rotten, half-dead. Armed with a pair of tweezers & some elbow grease, after surface extraction, I use the pointed tips of the tweezers to rake through the soil to ensure all plant material (inclusive of roots) are removed. I do not want any further rotten material inside this substrate.
  2. I re-laid a layer of powder-type Aqua Soil as a form of repair to the topsoil of my substrate.
  3. I completely covered the tank from any visible light to implement a total blackout. The tank “cover” was only removed at night to accelerate the dehydration within the substrate. Faced with depleting moisture & no source of light energy, the existing algae colony should be having a hard time.
Utter & complete wipe-out

Utter & complete wipe-out

& then it starts travelling underground. To destroy any possible foundation

& then it starts travelling underground. To destroy any possible foundation

New topsoil administered to the immediate affected area

New topsoil administered to the immediate affected area

Using powder-type Aqua Soil as the new topsoil

Using powder-type Aqua Soil as the new topsoil

More powder-type

More powder-type

& then I try as I might, to repair everything

& then I try as I might, to repair everything

I’m done for the night, I suppose. In fact, I’m surprised that I even have the strength to recover (& rebuild) from the calamity that has befallen my crop. But I guess when you are used to utter bad luck, you tend to bounce back faster.

Posted: February 14, 2012 by ralliart12 in Roadblocks, ~ § Aquascape § ~
Tags: , , , , , , , , , , , , , , , , , , , , , , , , , , , , , , , , ,